Posts

Showing posts from February, 2024

Week 4

Image
During this week, our group met 4 times, and attended 2 lab sessions. We had previously intended to use only one power supply, meaning every LED strip was already connected in parallel, so, in the first lab, we desoldered some of the wires that connected all of our LEDs in parallel. This meant that there were four sections of LED strips connected in parallel, which allowed us to power the LEDs with 4 different power supplies. Before we could test whether the LEDs would work, we were unsure of how to shut down the Raspberry Pi safely without using a monitor. We managed to resolve this issue by acquiring a small button from the technicians, which we then programmed to shutdown the Pi when it’s pressed. We then collected three 10A power supplies and wired each of them to 7 rows of LEDs, with the remaining 3 rows powered by a 3A bench supply. When we tested this, however, only 1 neopixel lit up (trust the process).  In our next lab session, we realised that this was because the Neopixe...

Week 3

Image
In the third week of our project, our group had two meetings and attended two lab sessions. During the lab sessions, we finished soldering wires to connect the LED strips' data lines in series. We also successfully soldered the 5V and ground connections of the LEDs in parallel. We then drilled a hole in the center of our board for the Pi camera and tested its visibility in the PC lab. We also secured the extra lengths of wire to the back of the board so we had neater cable management. In these sessions we encountered a couple of challenges. We were unable to install OpenCV for image processing and every attempt at installation took hours. We also faced an issue with the power supply we ordered as it was too exposed. Modifying the supply to cover the exposure was not possible as we could not do it ourselves and it would take too long to do, given our current time frame. In our meeting with our project supervisor, we explored the idea of changing the Neopixel mirror into a multipurp...

Week 2

Image
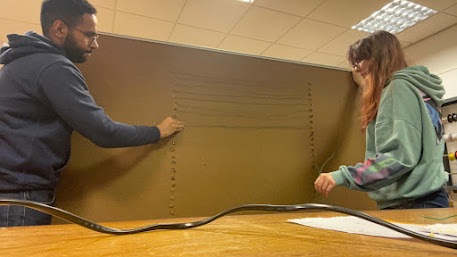
During this week, our group met 4 times, attending two lab sessions. In the lab sessions, we glued all the LEDs to the backboard and began using wires to connect each LED strips’ data input and output. The connections were done by soldering wires to each strips’ data input/output points.    We also started to work on the software of our project, setting up the Raspberry Pi and testing the Pi camera and LEDs. To test the Pi camera, the PiCamera library was imported into the code and used to preview the camera and take pictures and videos. During the testing of the LED strips, we encountered a few problems. In order for the LEDs to be controlled by the code, the Neopixel library had to be downloaded, which required an internet connection. This was an issue because the Raspberry Pi was unable to connect to the University WIFI. To counter this issue, we used a phone hotspot to connect to the internet while downloading the Neopixel library. After successfully installing the library...

Week 1

Image
For our project, we were originally inspired by Daniel Rozin's kinetic art pieces. We wanted to create something that was interactive, initially intending to use motors and wooden panels to create a display that made images usinglight and shadows. After researching ways to do this project, we came to realize that it was unrealistic to complete within the given timeframe, as too many motors would need to be used. We consulted with our supervisor to change our project to a LED Mirror, which uses Neopixel LEDs and a camera to see an image in real time, lighting up corresponding LEDs in the matrix to create an image of the person in front of the camera. As the LEDs we are using are Neopixel ones, each LED within the matrix can be individually addressed. For this project, our inspiration came from a youtube video by the youtube channel SuperMakeSomething, titled Giant Neopixel LED Mirror. In the first week of the project, our group attended our first lab session and had two meetings: on...